Why You Should Paint Your House in Spring

blog-hpWhen it comes to painting your home, three seasons have ideal weather: spring, summer and fall. However, not every day is perfect. Fall can be a bit too chilly spring conditions can be wet and hot summer days can be too sunny.

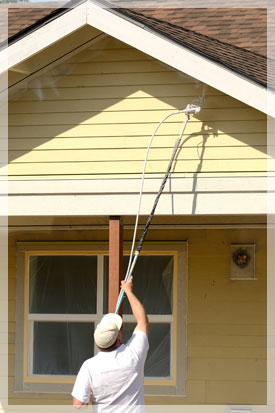
Out of all three, spring tends to have the most consistent weather for exterior painting. Planting and landscaping projects are also common around this time of year. By adding a protective finish to your home early on, you won’t have to worry about any interruptions when you lay down the mulch. Aside from this convenience, why else should you paint the outside of your home in spring?

1. Better Temperature

The “perfect” temperature for painting is above 50 degrees Fahrenheit, but not much higher, as heat can cause the paint to dry too quickly and form poorly.

2. It’s Right After Winter

It’s no secret that winter causes stress to our homes. However, the weather warming up doesn’t mean the wear and damage go away. In response, getting the job done earlier essentially renews your home’s exterior, which then fortifies it against the elements.

Read More

Wallpaper or Paint: Which is Better for Your Home’s Interior?

blog-wallpaper-paintAny homeowner wanting to change the appearance of a room has to decide between wallpaper and paint. Both have significant transformative qualities; however, each has its pros and cons.

Paint

These days, paint comes in a vast array of shades, as well as various sheens, finishes, and textures. Essentially, there’s an option out there specifically suited to your vision.

Too, on a practical level, your home needs minimal preparation – nothing more than cleaning the walls, if wallpaper isn’t added – and generally costs less to add.

Yet, costs go up as soon as your home requires a more durable, splash-proof coating – something you’ll definitely need if you have children. On the other hand, you can easily cover marks and blemishes should they occur down the line.

With any type of paint, there always runs the risk that it’ll chip and require frequent touchups. In a more serious instance, paint may start flaking just two years after the job – a sign it wasn’t initially applied correctly.

Read More

4 Tips for Painting a Window

Window-Frame-Painting
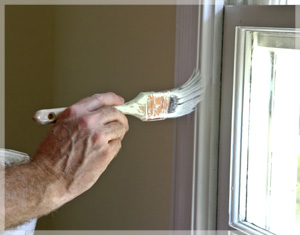
The weather’s just right for getting an interior paint job done, whether it’s a full room or just one window.

When you attempt to do a smaller project on your own, keep these tips in mind:

1. Prep the Area

You want the paint to adhere to the surface as best as possible. For a wooden window frame, wipe it down with a household cleaner first, and then sand with 120-grit sandpaper. This process removes older paint and smoothes out raised grain. If there are any curves or contours, go over them with a sanding block.

Does the wood have any holes or places where it meets the wall? Fill these areas in with putty and caulk, respectively.

Then, prime the bare wood. This later improves adhesion. However, before you add the paint, make sure this coating dries overnight.

Read More

14 Tips for Effectively Painting Interior Doors

blog-interior
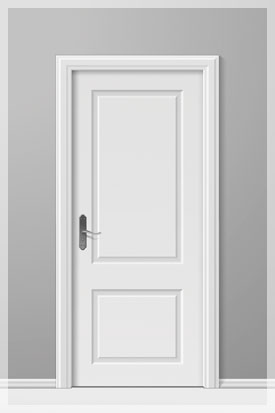
Sometimes, the paint job looks manageable on your own. You think you can do it, but later find the paint appears splotchy, cracks start to form, or the door ends up sticking to the frame.

To make sure the job gets done correctly, consider these tips:

  1. Remove the door from the hinges and lay it flat. This helps with getting a smoother finish, as you’ll be able to spread the paint easier.
  2. Clean off the door completely and let it dry. It’s advised to remove any paint buildup with a scraper and sandpaper until a smooth surface results.
  3. Prime it. This is the simplest way to prevent staining and dark blotches. In turn, the paint sticks better to the surface.
  4. Sand between coats.
  5. Fill in any holes and gaps before you start to paint.
  6. Use a roller over a brush, if the door’s flat. You’ll be able to spread the paint more evenly.
  7. If it’s a raised panel door, however, apply the paint with a brush.
  8. As you paint, work from the center outward.
  9. Consider paint with a semi-gloss or gloss sheen. Long term, the door becomes more durable and is easier to clean.
  10. Read More

23 Common Decorative Painting Techniques

23FinishesLooking to transform the look of a room at a minimal cost? Decorative painting does the trick. Forget about new materials being installed. Instead, a professional house painter like M. Brett’s team employs a combination of the following:

Broken Color: Manipulating a wet, glazed surface adds more variation to your wall.

Chalkboard Paint: Adding a few coats results in a washable and functional chalkboard on a flat wall.

Checkerboard: The contrasting diamond pattern imitates the look of marble floors for an elegant touch.

Color Washing: Visually, an ethereal hue is added on top of a solid shade. Technique wise, a paint and glaze combination goes on as a second coat.

Crackle: The undercoat shows from beneath. To do this, the painter adds a rapidly-drying top coat over a slow-drying base coat.

Dry-Brushing: Paint gives your walls a textured look to imitate wood.

Flogging: Using a long-bristled brush to slap the surface creates the look of wood pores.

Read More

13 Common House Painting Issues

You add a fresh coat of paint, but in just a year, it’s already flaking off. So, before you make the same mistake again, think about what went wrong.

The following issues often become evident after you’ve painted a house, resulting in peeling, uneven coloration, and other visual distractions:

Blistering: An issue for flat and acrylic paints, blistering emerges as small- and medium-sized bubbles under the paint film. These may form when paint is added to wood siding and trim, especially when the job is done in direct sunlight, on an uneven surface, on a hot substrate, when the wood is damp, when moisture escapes through the walls, or from poor surface preparation.Alligatoring: Paint starting to look like scales on an alligator results from a second coat applied before the first one dried, incompatible paints, or aging oil-based paint. This is particularly an issue for older homes, which often use oil-based paints.

Efflorescence: This condition occurs when white salt deposits bubble through the paint from the masonry. When the surface is poorly prepared, moisture ends up migrating through the walls.

Read More