New England Painter's Blog

The Top 5 Benefits of Pressure Washing Your Home

blog-pressurewash
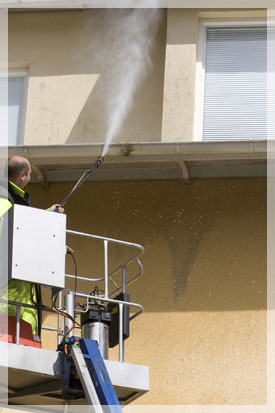
You notice dirt has accumulated on the siding, roof, and sidewalk. So, you think to yourself, “I can clean it, but it’ll take some time and skill.” Yet, when you go to attempt the project, you find it far more difficult than predicted: You notice mildew, and that dirty film just won’t budge in some places.

Now’s the time to give pressure washing a chance. The process, of applying a steady, fast stream directly to your home’s surface, offers several important benefits:

Getting Extra Clean

Scrub all you want, as hard as you want. When it comes to sheer power, pressure washing has you unmatched.

This results in effective loosening and washing away of dirt, mildew, and other debris embedded in your home’s exterior. Too, the heavy-duty process is strong enough to remove mold from siding and shingles, eliminating a major health concern in the process.

Increases Value

Believe it or not, washing away all that dirt, and doing it thoroughly, is said to increase your home’s value when you put it on the market. Just how much more? Some experts say a good cleaning warrants an additional $10,000 to $15,000.

Decreases the Cost of Exterior Repairs

A sufficient cleaning benefits your home’s lifespan. Short term, removing the dirt cuts down on rot, decay, and premature aging, thus eliminating the need for repairs. Long term, you get more use out of your siding and driveway.

As well, completing pressure washing ends up being friendlier on your wallet. The process, overall, costs less than making any of the above repairs.

Improve Curb Appeal

The cleaner the house, the better it is to look at. Pressure washing once a year revitalizes your home’s exterior appearance, and further brightens up any driveway, sidewalk, deck, and porches surrounding.

Additionally, you or a professional will be able to access roofs and gutters. Essentially, the full property becomes thoroughly clean.

Environmentally Friendly

M. Brett and other pressure washing companies take an environmentally-friendly approach, as harsh chemicals aren’t used.

If your home has started to assume a dingy, dated look, pressure washing may be needed. For those in Southern New England, contact M. Brett Painting for more information.

14 Tips for Effectively Painting Interior Doors

blog-interiorSometimes, the paint job looks manageable on your own. You think you can do it, but later find the paint appears splotchy, cracks start to form, or the door ends up sticking to the frame.

To make sure the job gets done correctly, consider these tips:

  1. Remove the door from the hinges and lay it flat. This helps with getting a smoother finish, as you’ll be able to spread the paint easier.
  2. Clean off the door completely and let it dry. It’s advised to remove any paint buildup with a scraper and sandpaper until a smooth surface results.
  3. Prime it. This is the simplest way to prevent staining and dark blotches. In turn, the paint sticks better to the surface.
  4. Sand between coats.
  5. Fill in any holes and gaps before you start to paint.
  6. Use a roller over a brush, if the door’s flat. You’ll be able to spread the paint more evenly.
  7. If it’s a raised panel door, however, apply the paint with a brush.
  8. As you paint, work from the center outward.
  9. Consider paint with a semi-gloss or gloss sheen. Long term, the door becomes more durable and is easier to clean.
  10. Read More

6 Reasons a Paint Job Doesn’t Last as Long

painted-houseOn average, your house should be painted every 15 years. Of course, location plays a part; in certain regions, expect to add a coat every five to 10. Yet, when it’s only lasting one to three years, something’s wrong.

Multiple instances play a factor:

Temperature

Especially if you’re doing the work on your own, realize that the weather influences how your paint dries. Never paint when it’s too cold and damp; the paint takes extremely long to dry, and in the process, it’s exposed to moisture and debris.

When it’s too hot and humid, however, water-based paints dry too quickly.

What’s ideal? Aim for a temperature of 50°F to 85°F for at least 48 hours without rain. This weather allows the paint to stick to the siding and dry in the right amount of time.

Read More

23 Common Decorative Painting Techniques

23Finishes
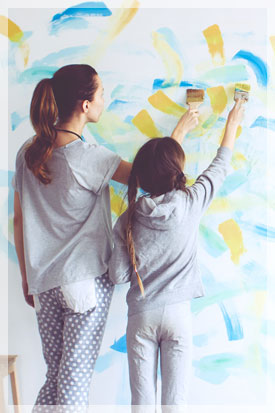
Looking to transform the look of a room at a minimal cost? Decorative painting does the trick. Forget about new materials being installed. Instead, a professional house painter like M. Brett’s team employs a combination of the following:

Broken Color: Manipulating a wet, glazed surface adds more variation to your wall.

Chalkboard Paint: Adding a few coats results in a washable and functional chalkboard on a flat wall.

Checkerboard: The contrasting diamond pattern imitates the look of marble floors for an elegant touch.

Color Washing: Visually, an ethereal hue is added on top of a solid shade. Technique wise, a paint and glaze combination goes on as a second coat.

Crackle: The undercoat shows from beneath. To do this, the painter adds a rapidly-drying top coat over a slow-drying base coat.

Dry-Brushing: Paint gives your walls a textured look to imitate wood.

Flogging: Using a long-bristled brush to slap the surface creates the look of wood pores.

Read More

Explore All the Types of Wallpaper for Your Home

A homeowner looking to give a room a new look often considers wallpaper. The options out there, however, appear innumerable, factoring in backing, strength, and material. So, what’s the right choice?

We describe common types of wallpaper and wall coverings to help you narrow down your selection:

Borders: The smallest and simplest, this wallpaper features a design printed onto a paper backing. Vinyl coats the surface. You can apply this onto a painted wall or directly onto wallpaper.

Embossed: Ideal for covering a slightly damaged wall, the design is pressed into a paper backing, creating a textured look. This style includes anaglypta.

Rolls-Of-Wallpaper-In-Differen-80718941
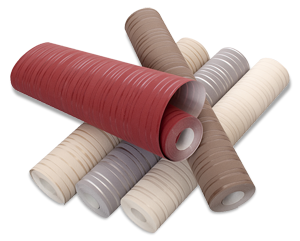
Expanded Vinyl: A design is printed onto a paper backing and the treated with a vinyl or PVC topcoat. Most wallpaper falls within this type, as the material is easy to install and wash, and resists grease and moisture better.

Fabric-Backed Vinyl: Made with a woven fabric backing, this extremely durable covering can be added over rough walls and is designed for high-traffic areas. Later, should you decide to remove it, it comes off in strips.

Read More

13 Common House Painting Issues

You add a fresh coat of paint, but in just a year, it’s already flaking off. So, before you make the same mistake again, think about what went wrong.

The following issues often become evident after you’ve painted a house, resulting in peeling, uneven coloration, and other visual distractions:

Blistering: An issue for flat and acrylic paints, blistering emerges as small- and medium-sized bubbles under the paint film. These may form when paint is added to wood siding and trim, especially when the job is done in direct sunlight, on an uneven surface, on a hot substrate, when the wood is damp, when moisture escapes through the walls, or from poor surface preparation.Alligatoring: Paint starting to look like scales on an alligator results from a second coat applied before the first one dried, incompatible paints, or aging oil-based paint. This is particularly an issue for older homes, which often use oil-based paints.

Efflorescence: This condition occurs when white salt deposits bubble through the paint from the masonry. When the surface is poorly prepared, moisture ends up migrating through the walls.

Read More

The Right and Wrong Ways to Remove Wallpaper

Wallpaper removal is far more difficult than it appears. Often, a professional is needed, as the job becomes messy and time consuming very quickly. Not to mention, using the wrong tools may damage the wall’s surface.

No matter how you go about it, there are good practices – and some that should be avoided.

The Right Ways

Girl-Wallpaper

    • Keep the Floor and Trim Dry: Water and steam are often involved, so protect other surfaces – the floor, trim, furniture, vents, and artwork – by taping down plastic sheets.
    • Turn Off All Electricity to the Room
    • Pull Off the Material: Ideally, start at a corner and peel it off without water. In doing this, you’re taking off the top material while leaving the backing on the wall.
    • Removing the Backing: At this point, water becomes necessary. Some professionals say to add it first, by sponge or a wet cloth, so that the paste absorbs it. From here, use a metal spatula or putty knife with rounded corners to remove as much paste as you can. Be aware: scraping too hard, especially on drywall, may damage the surface.
    • Use a Gel Stripper: Paste may still remain after you scrape most of it off. As a result, some recommend adding a gel stripper to remove the rest. Can’t tell if it’s there? If the wall’s surface still has a shiny sheen to it, the backing isn’t completely gone.
    • Use a Scoring Tool: As another option, score the surface first to allow the water to get through, and then remove the residue with a stripping solution.

    Read More

    4 Signs Your Home Needs a New Coat of Paint

    Paint isn’t just an aesthetic aspect – it serves a protective purpose, as well. And when its appearance starts to fade, something more serious could be occurring. Wood, particularly, is more susceptible to rot, mold, and mildew, and if you’re not attentive enough, these could already be forming, exacerbating the damage in the process and resulting in more expensive repairs down the road.

    Painter-at-work-on-the-exterioSo, before you deal with structural issues, look out for the following signs:

    Fading

    It’s an obvious choice. Paint tends to fade in areas that receive the most sun, usually the south and west sides. In these and other spots, chalking may accompany fading. Aren’t sure? Check with a wet rag; if there’s chalking, a white film will come off.

    As well, fading indicates moisture may already have entered any wood boards. Look for signs of warping just to be sure. In any case, a fresh coat helps keep out the elements.

    Peeling

    Places receiving the most moisture start to peel, so check your window sills and the trim at the bottom of the garage and door. In these spots, because it’s easy for water to get through, check if the paint’s coming off in large areas or if it’s chipping.

    Layers that peel away indicate poor adhesion. For the last paint job, the surface likely wasn’t prepared properly; often, the paint already had bubbles and blisters. However, layers may also indicate moisture has entered or that low-quality paint had previously been used.
    Read More

    Never Paint Your Home in These 3 Weather Conditions

    Painter-painting-exterior-trim
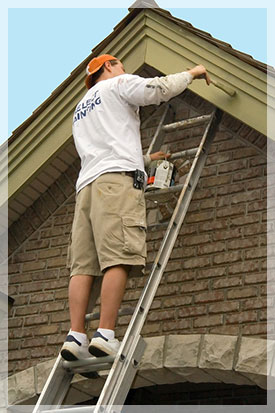
When a homeowner requests house painting services for the exterior, one question that frequently comes up is, “Is it the right time of year for a fresh coat of paint?”

    While there’s no perfect instance, certain conditions are ideal for priming and adding two coats to a surface. On a very general level, this ideal range tends to be between 50°F to 90°F – so, a good deal of the year for those in New England – and not too sunny, too wet, or too windy.

    That being said, there are a handful of exceptions. Some acrylic paint formulas allow you to apply a coat in temperatures down to 35°, or a bright day with lots of sun in winter is far better for getting the job done (or, at least part of it) before the dark and wet conditions set in.

    However, not painting in desirable weather ends up having long-term consequences. Specifically, the job simply doesn’t last as long, with cracks forming sooner. For your home’s exterior, this reduces any barrier the paint creates – not to mention, it starts to give the property a worn appearance.

    Read More